

Project Details
The Courtyard Quilt is a super quick and easy to finish quilt pattern. The strip pieced design paired with Cloud 9's Warm & Cozy fabric collection creates an epic holiday quilt that would be perfect to throw together as a last minute Christmas gift! The best part is it is a FREE download you can find here.
The second best part is I created a quilt kit for the Warm & Cozy holiday version (shown below) and you can find that in my online shop.
Finished Size: 46” x 55”
Skill Level: Beginner
Fabric: Warm & Cozy Collection from Cloud 9 - Find the KIT here
Pattern: The Courtyard Quilt from Cloud 9 - This is a FREE download from Cloud 9’s Make It Sew Projects
Besides tweaking the fabric selection, I simply followed the written pattern to finish this quilt. In this post, I'll share some personal tips I used to finish the quilt top!
The Pattern
The Courtyard Quilt pattern calls for 10 different fabrics (labeled B through K).The Warm & Cozy collection only has 8 different fabrics so, to solve this, I combined the cuts of fabric J with fabric K; and the cuts of fabric H with fabric B.
For example, I used the red snowflake fabric for both fabrics J and K and I used the pink plaid fabric for fabrics H and B.
Creating the Rows
Two print rectangles will be sewn together with one solid white rectangle in between to create one block. Blocks are then arranged in rows in alternating directions.

Once the blocks are arranged in rows, you'll take a solid white rectangle and sew it to the right of each block (minus the blocks in the last row).

The Quilt Top
The pattern then states to sew a long strip of solid white in between each row, called a "sashing strip."
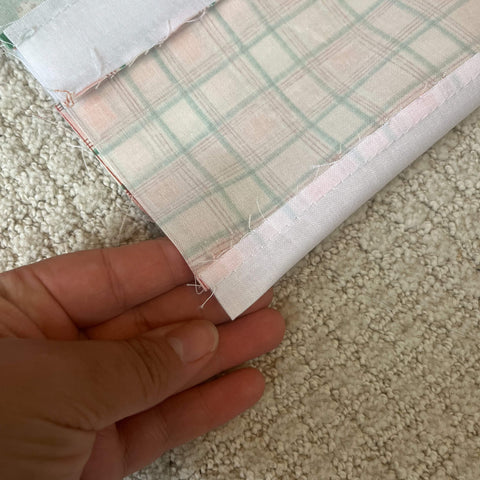
A quick tip for sewing rows together: Because there is a sashing strip between each row, it is unnecessary to match up the block seams as you normally would when sewing rows together. However, lining up the rows is still important because you want to create straight lines running through the quilt.
In order to get the strips between blocks to line up, I laid the two rows on top of each other, flipped the row on top back just a little and lined up the two solid white strips.


Step 1: Fold your quilt in half lengthwise and put a crease in the center at the top and bottom of the quilt. You can either put a quick iron to it or simply pinch the fabric between your fingers to create a crease.


Step 4: This is where the magic happens. First fold your quilt in half widthwise this time and make a crease to mark the center of the quilt. Then do the same with your border strip. Line the two center creases up and clip or pin together.


